Download
Remowo is an iPhone exclusive application.
Download from the App Store below.
![]()
About Remowo

A time card application for remote work.
You can use the 1-day mode for inputting data for the current day and the batch input mode using the calendar.
In the case of 1-day input mode, location data is also recorded together.
Just by selecting the form of coming to work, data in JSON format will be sent to the administrator’s terminal by SMS.
Work management is possible by aggregating the data sent to the manager side.
The location data sent in the case of 1-day mode serves as proof of attendance.
The data is sent in JSON format, and work management can be performed by summarizing it on the administrator’s terminal.
In addition, it is convenient when entering all at once because you can perform batch entry using the calendar.
However, no location data is sent with bulk entry.
How to use
Application first launch
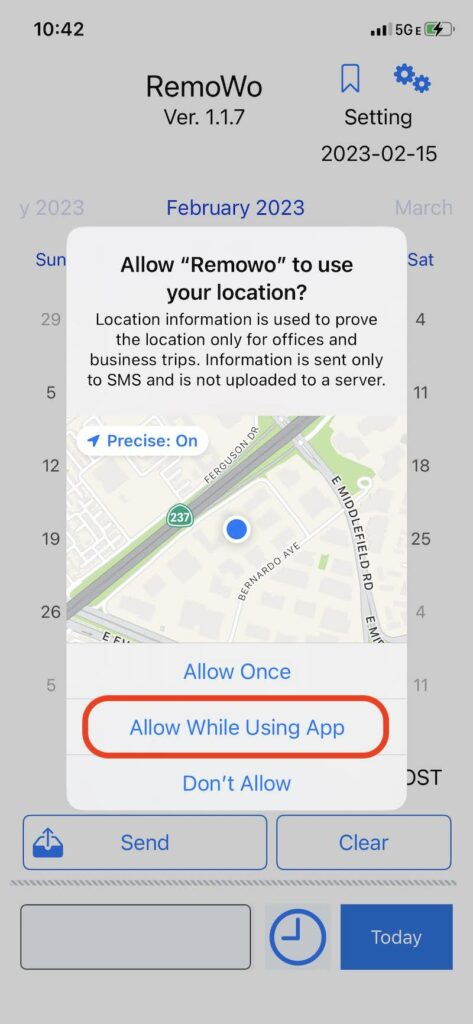

When you start for the first time, you will be asked for permission to use location information and camera. The location information is used for proof of coming to the office, and the camera is used to read the QR code.
Location information will be used only for proof of coming to the office and will not be used for any other purpose.
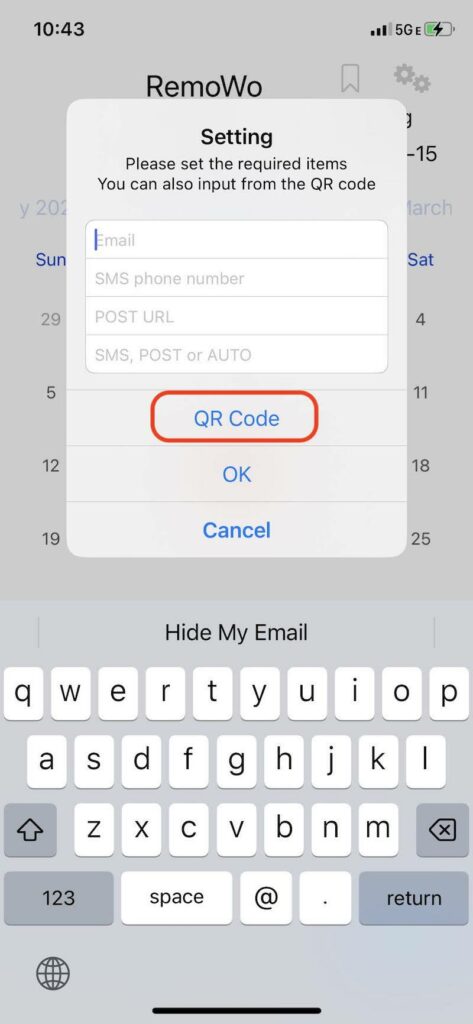
Setting
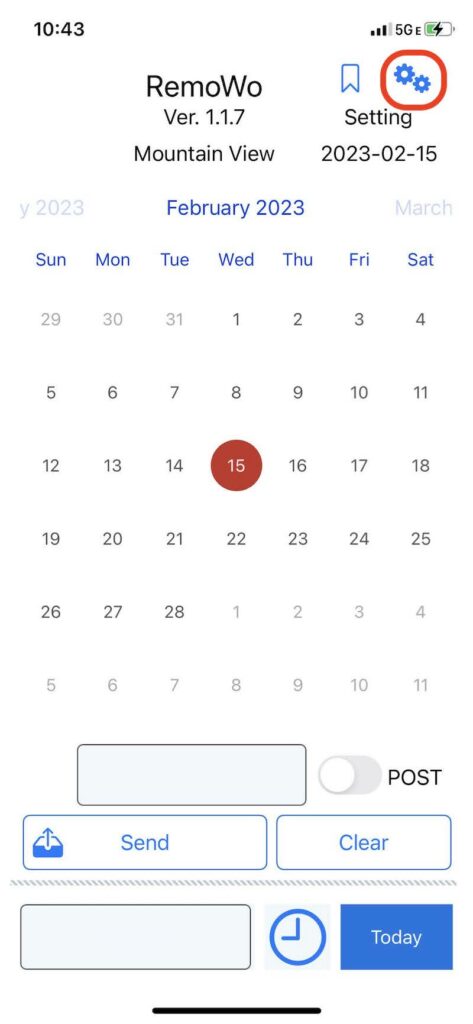
Make settings from the settings icon in the upper right.
The settings are
- Email : your e-mail address
- SMS phone number : SMS destination phone number
- POST URL : URL of the server to send data (https://xxx.xxx.xxx)
- SMS, POST or AUTO : Select the sending method.
- SMS : A short message is sent to the destination phone number. The SMS/POST switch becomes SMS and cannot be operated.
- POST : Sent to the server. If the server URL is not set, it will be sent by SMS. The SMS/POST switch becomes POST and cannot be operated.
- AUTO : It will be sent by the method selected by the SMS/POST switch.
Enter these contents.Leave POST URL blank when sending by SMS.
If POST URL is blank, data will be automatically sent by SMS.
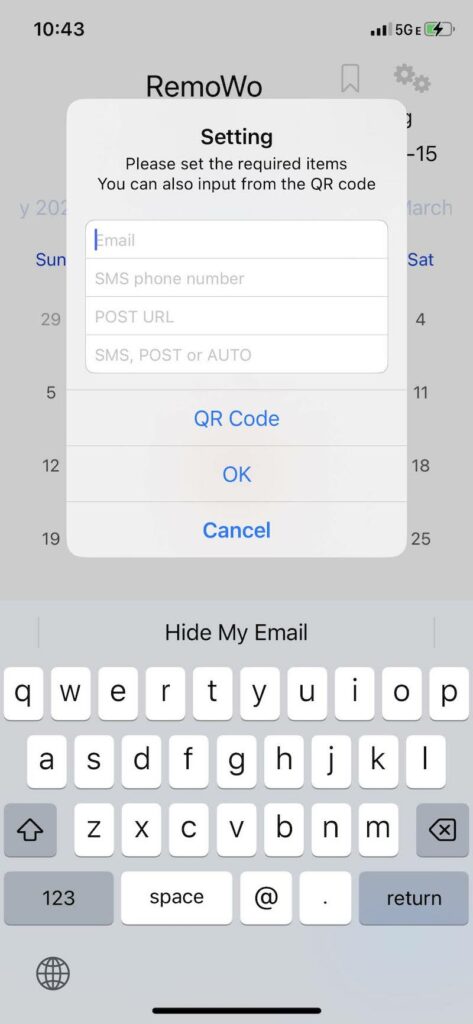
The information once entered is saved, so it is only necessary once at the beginning.
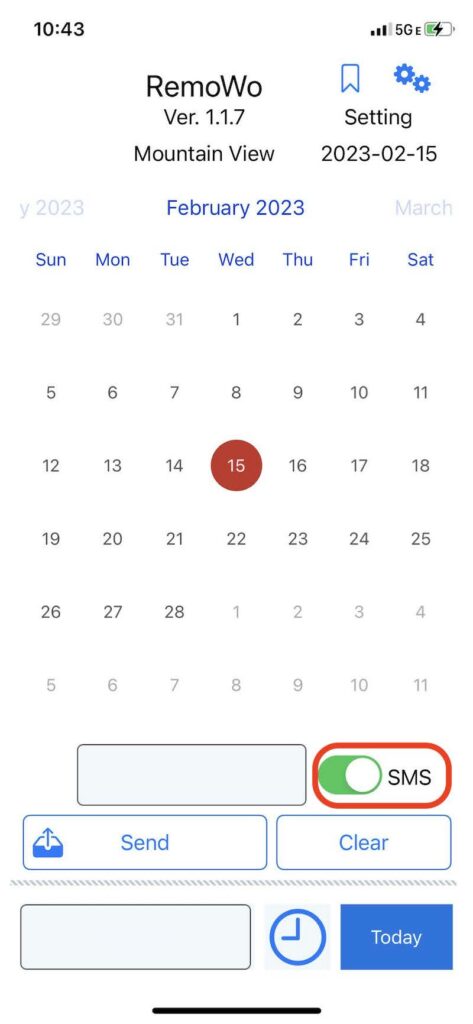
SMS/POST Switch
With the SMS/POST switch at the bottom right of the screen, you can select whether to send by SMS or send to the server by POST.
However, this switch cannot be operated when SMS or POST is selected on the setting screen.
Available only when AUTO is selected on the setting screen.
QR Code
You can also input setting data using a QR code.
Tap “QR Code” in settings.
The camera will start up, so if you put the QR code in the area, the QR code will be read automatically.
You can check the loaded data by opening the settings.
In addition, e-mail addresses, phone numbers, and URLs are automatically determined.
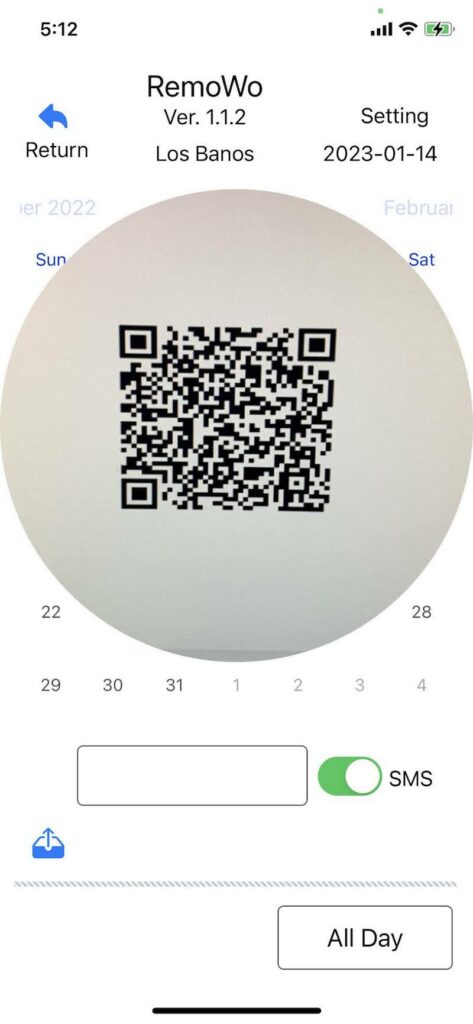
When the QR code is read, the camera image will automatically close.
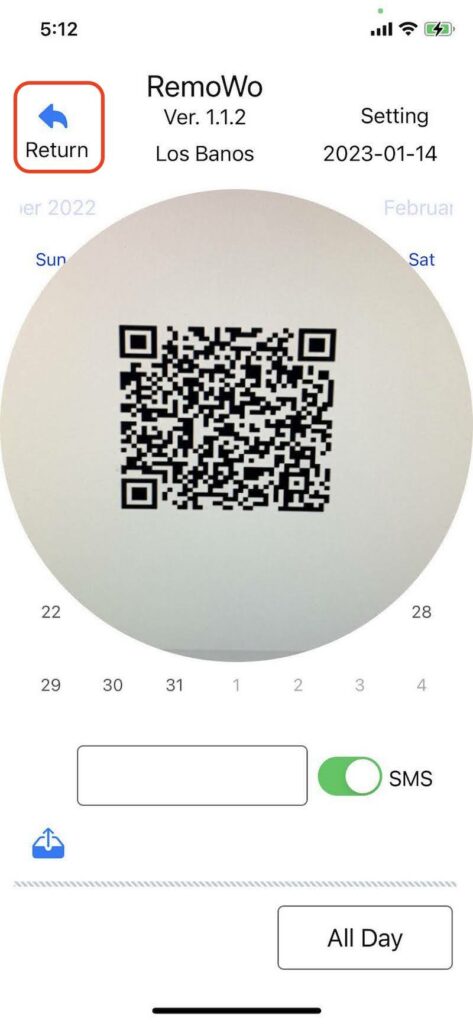
If you want to force quit, tap the upper left icon or double tap the screen to exit the QR code reading mode.
Setting Labels
You can set custom labels for your destinations.
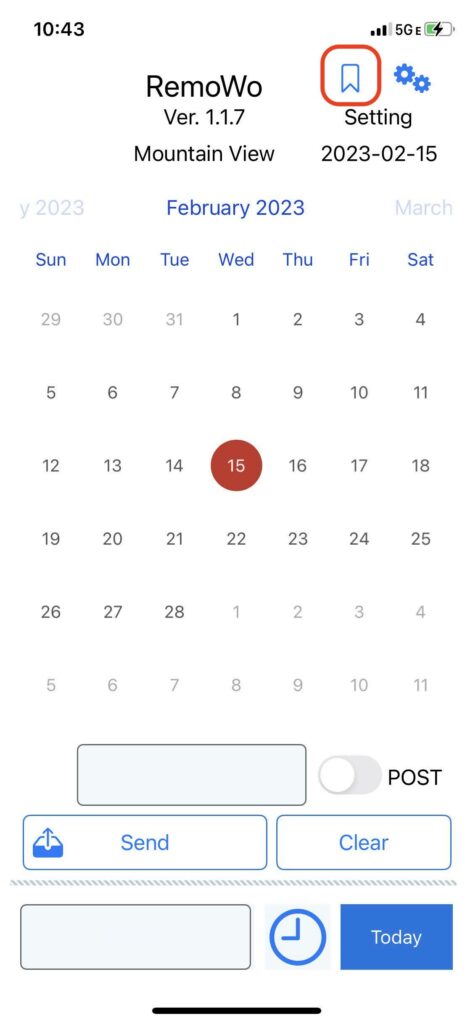
Tap the label icon on the top right.
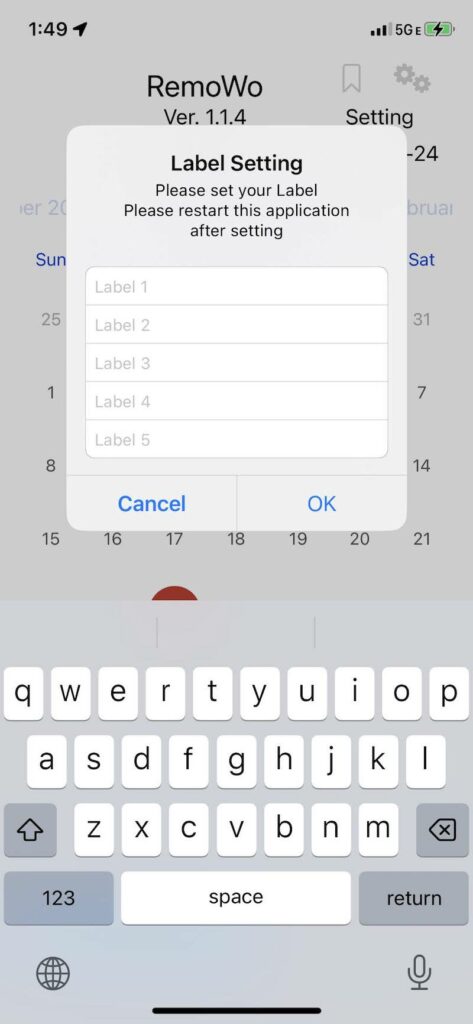
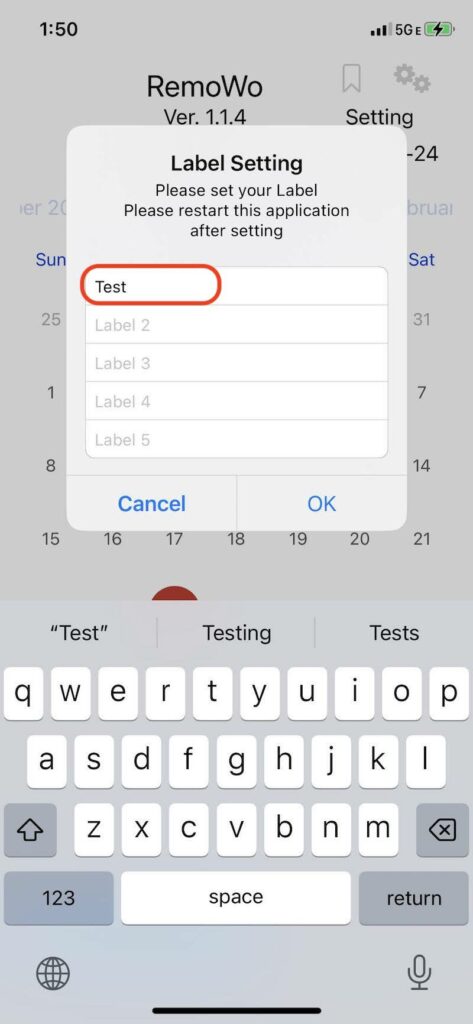
Enter a label and tap OK.
Be sure to restart the application after setting the label.
The set label will not be reflected until you restart.
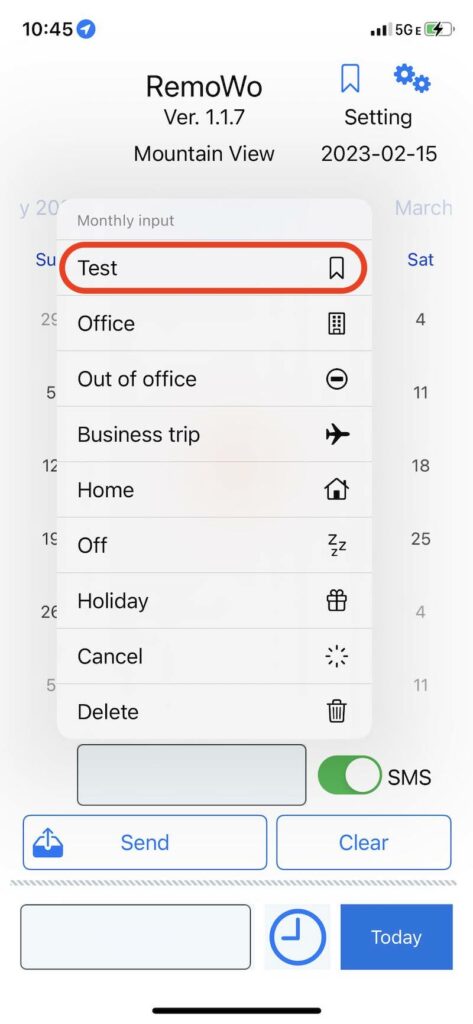
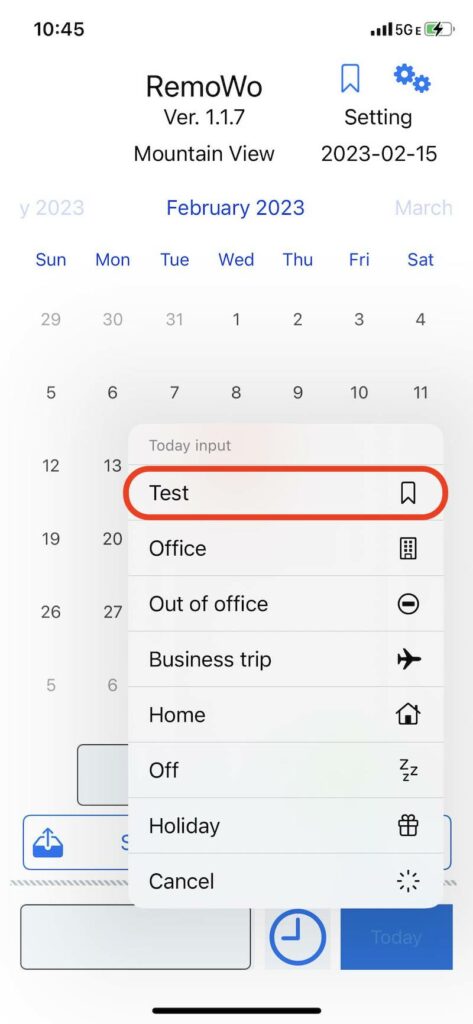
After rebooting, the label set in the menu will be added as shown below.
Labels can also be added via QR code.
If you separate them with commas and enclose them in [], they will be registered as labels.
Example) 0000000,[Test],[Test2]
Input method
You can specify the following 6 locations as work locations.
- Office
- Out of office
- Business trip
- Home
- Off
- Holiday
There are two input methods: 1-day input mode, which allows you to input data for only one day on the current day, and batch input mode, which allows you to input data all at once using the calendar.
Each is described below.
1-day mode
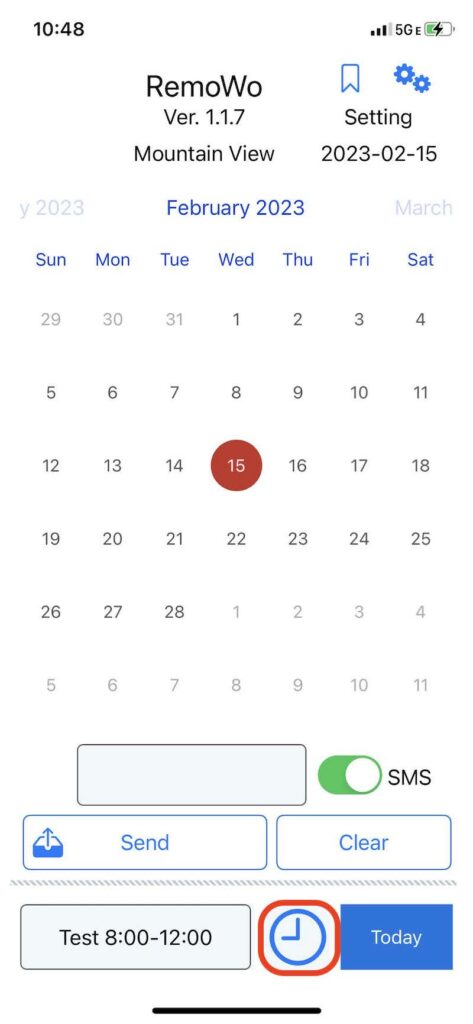
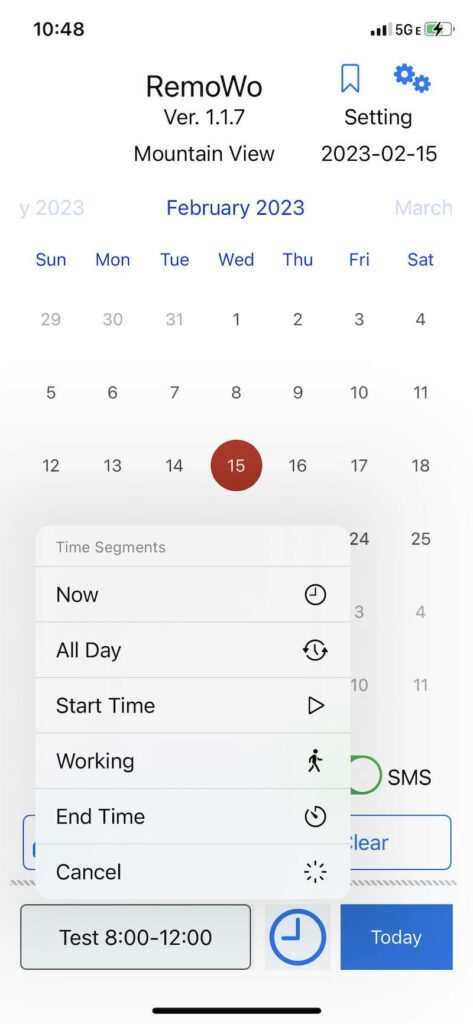
Set up time divisions.
In the case of input in units of one day, there is no need to change this part with the default “Now”.
Use only when you want to send more details such as start time and end time.
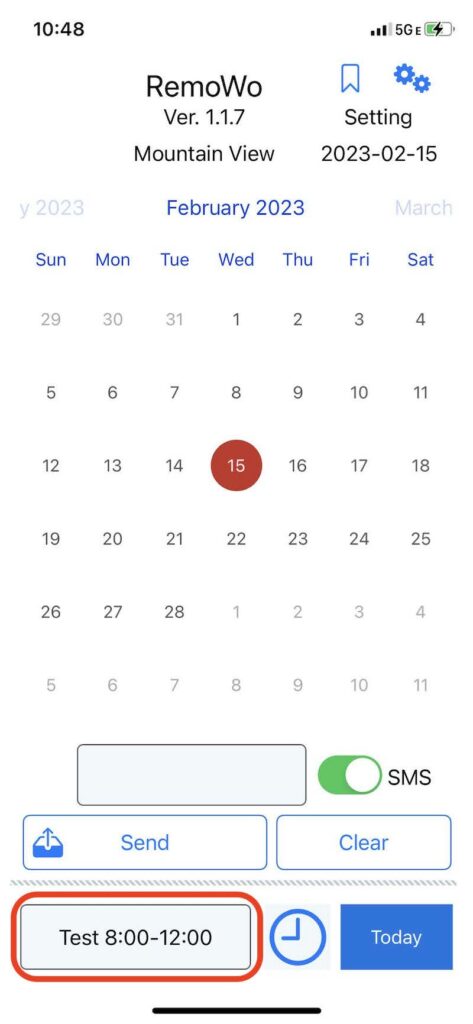
Tap the bottom left frame and enter the detailed information of the destination.
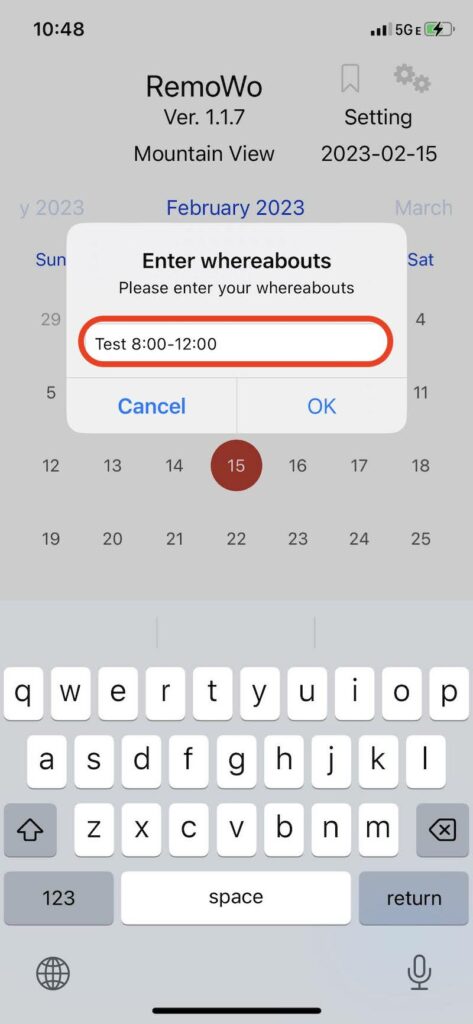
The entered data is displayed. This data will be sent with it.
Then enter the type.
A menu will be displayed, so select one of the following.
- Now — Send current status
- All Day — Send data on a daily basis
- Start Time — Send at start time
- Working — Sent during working hours
- End Time — Send at end time
Tap the “Today” button.

A menu will be displayed for you to select according to your work situation.
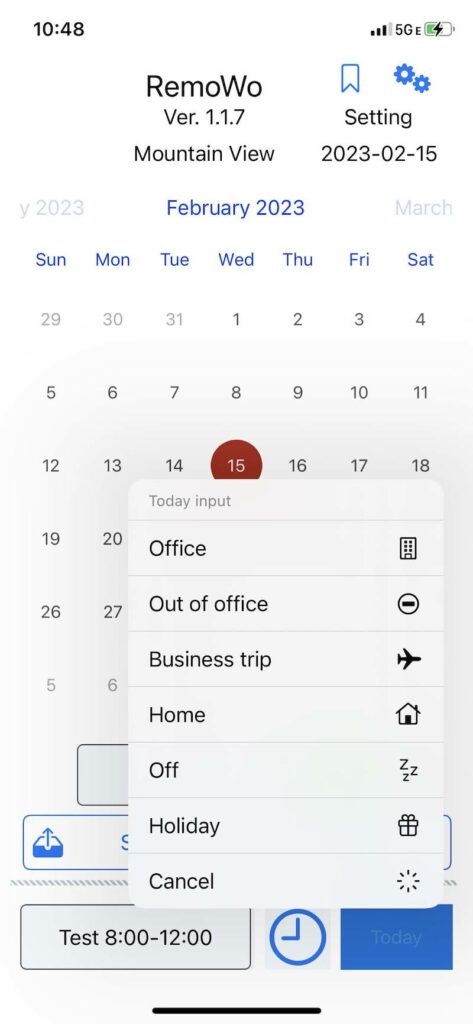
Selecting it will switch to the SMS sending screen.
When you tap the send button, the data will be sent by SMS.
Batch input mode
You can use the calendar to send data for multiple dates at once.
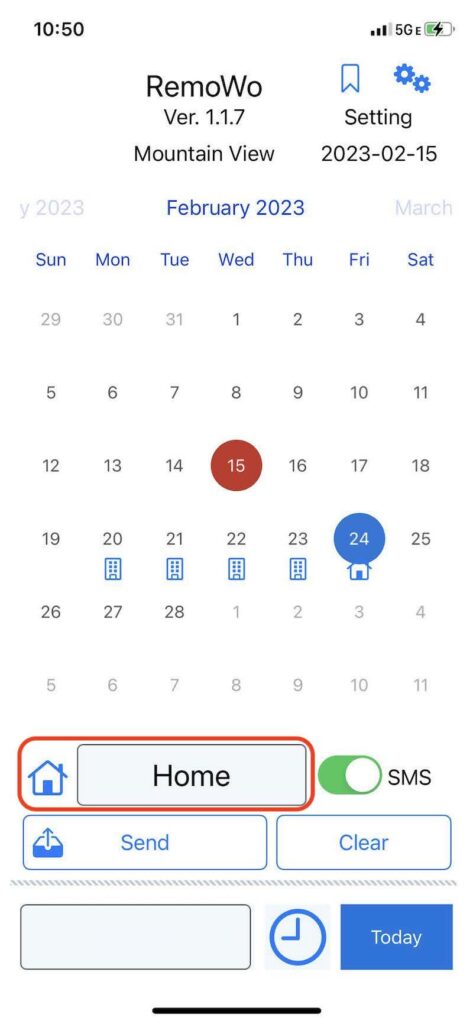
First, touch the date you want to enter from the calendar.

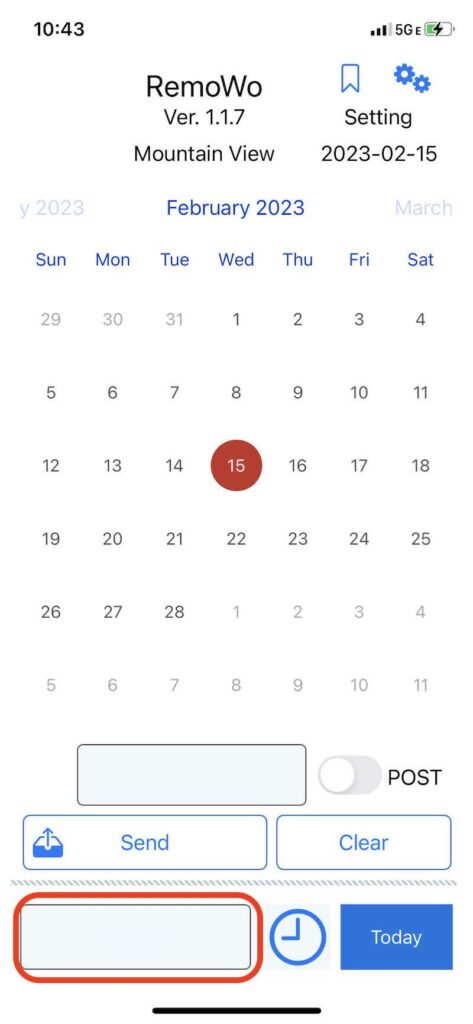
After selecting the date, tap the frame in the lower right corner.
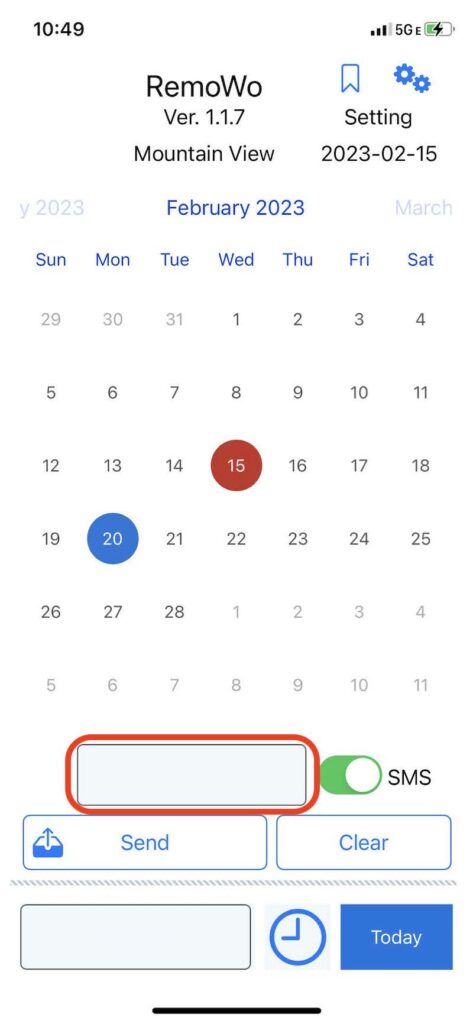
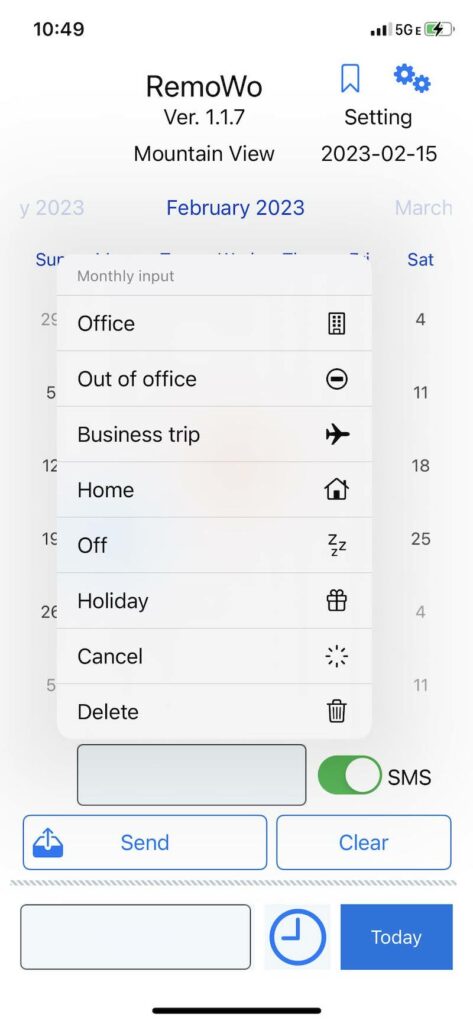
A menu appears. Choose according to your work location.
The selected content and icons are displayed at the bottom of the screen.
An icon is also displayed on the calendar date.
Tap a date in the calendar to view its contents here.
Set all the dates you need in the same way.
After setting, tap the “Send” button.
You can also tap the “Clear” button to delete all the entered information.
If you want to delete only the contents of a specific date, tap the date and select “Delete” from the “Select” button menu.
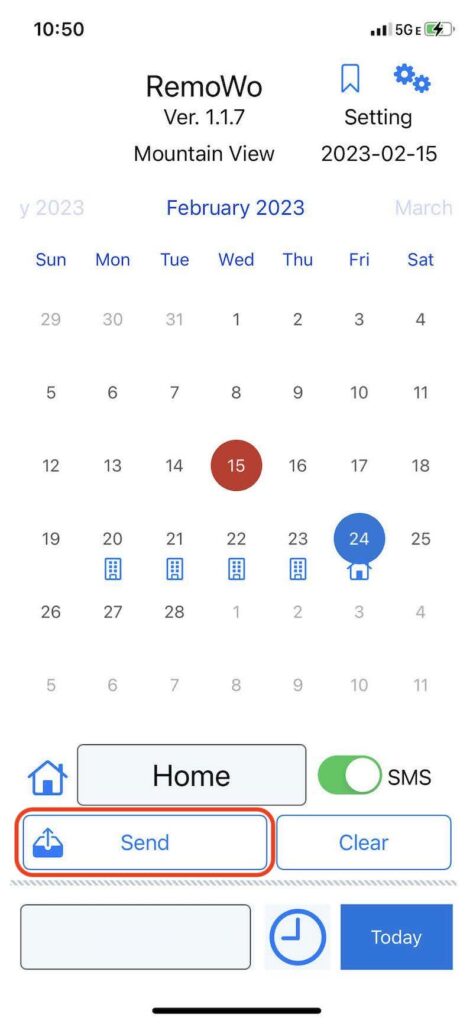
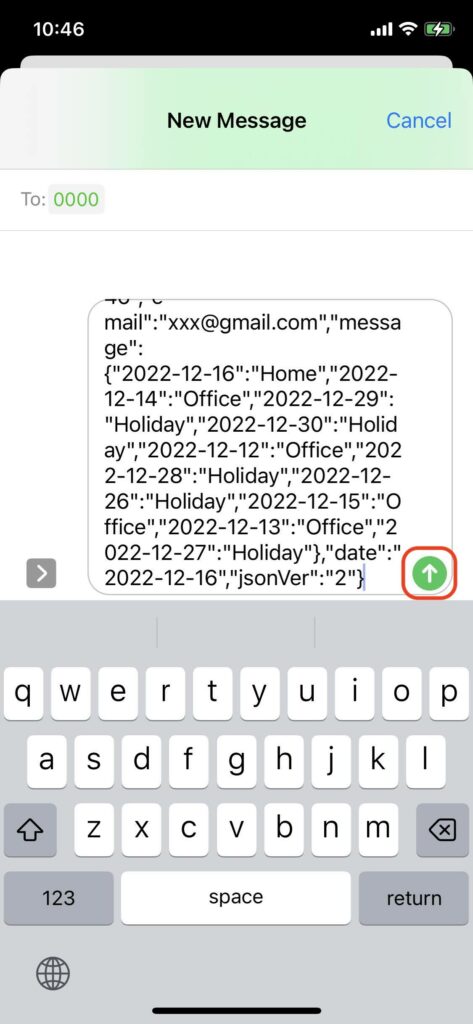
The screen will automatically switch to the SMS transmission screen, so tap the send button and the data will be sent by SMS.
Processing of transmitted data
After sending, please process freely according to the purpose.
From simple usage such as reporting to the boss by SMS, it is also possible to build a system that aggregates on the server and processes by group.
SMS Data
Daily work can be reported by entering the manager’s phone number in the SMS destination.
If you want to aggregate data in earnest, you can also aggregate on the server side by programming using a service such as Twilio.
Please refer to the following site for the aggregation method using Twilio.
Response
{“status”:”OK”}
JSON Data
1-Day mode
Please parse properly when processing on the server side.